Saturday, September 28, 2013

Selfish Sewing Week: The East meet West Shirt

Remember the lovely hawthorn dress I finished earlier this week? I had some remnant chambray left and I wanted to turn the into a long sleeve shirt for myself. But there isn't sufficient yardage left, so I choose a Japanese floral cotton from my stash for a little bit of contrast. This Japanese cotton is brought many years back, and is so precious that I could not bring myself to cut into it. But enough is enough, I just couldn't resist mixing it with this chambray for my new shirt.

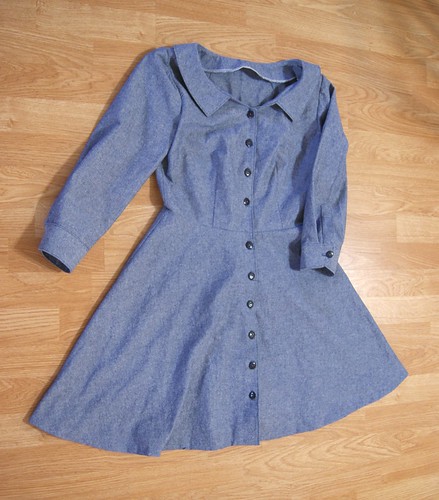
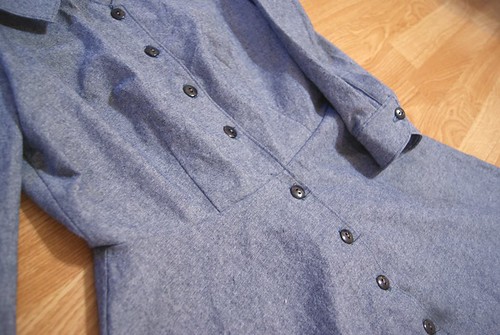
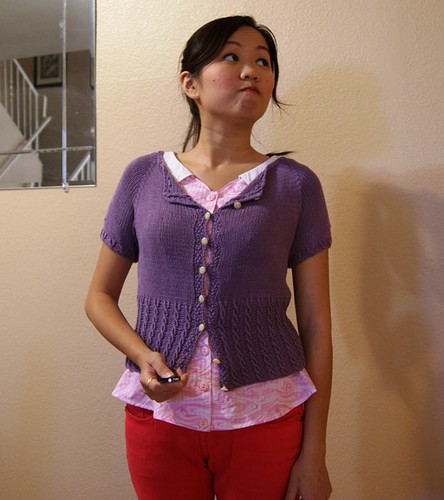
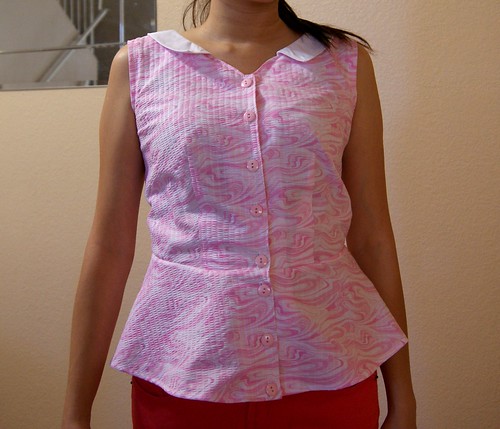
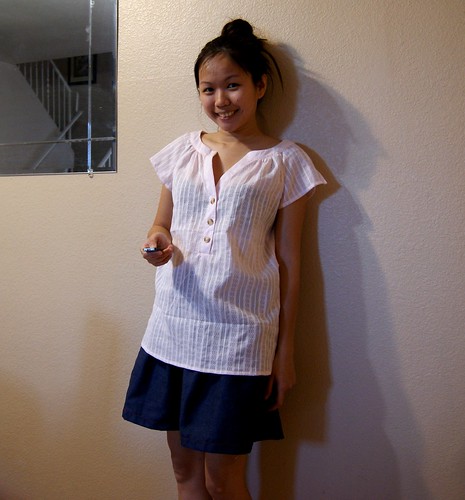
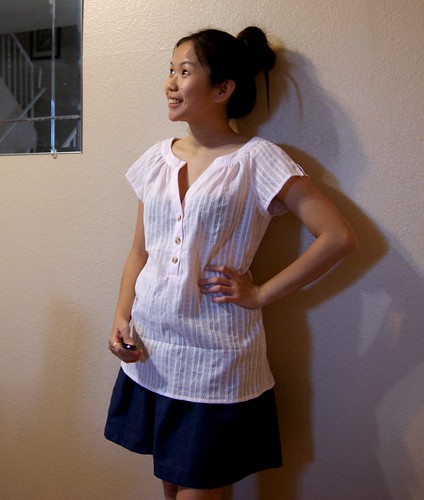
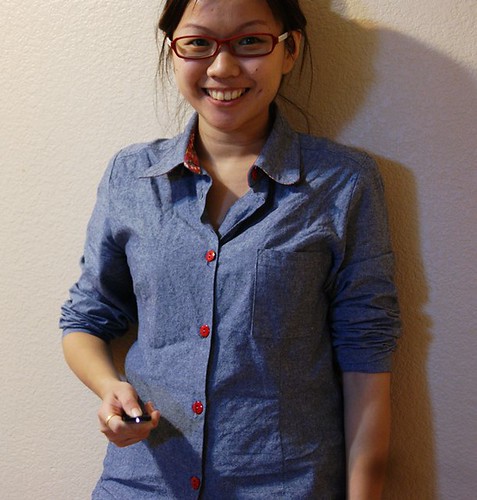
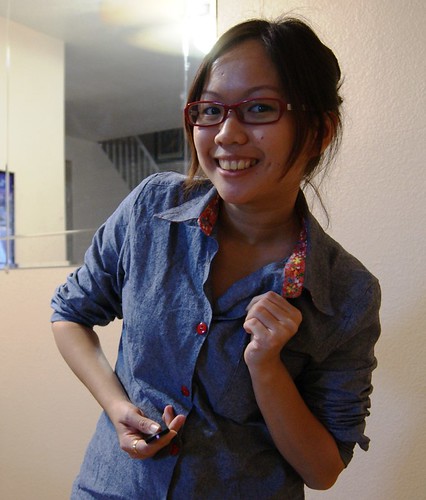
Sewing Pattern used: From a super old Japanese sewing magazine... I think I brought it at least 10 years ago. HA! It's a basic shirt pattern, I added the patch pockets myself and used the red flora cotton for the under collar, and back yoke lining. I am in love with red recently, so be prepared to see more reds apparels popping up here.
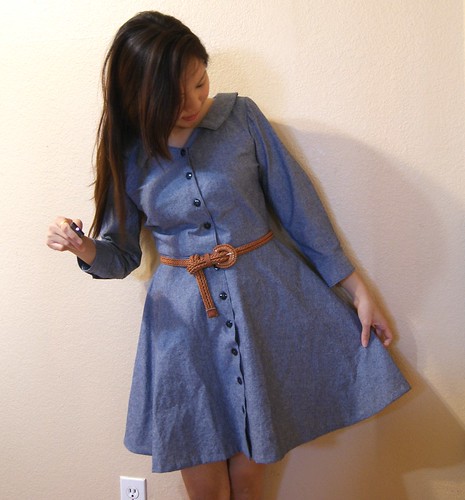
Materials used: Remnant chambray shirting from my hawthorn dress, jap cotton, red buttons and interfacing.

 
Thoughts on this project: I omitted the bodice front interfacing again cos my precious interfacings keep running out. The sleeve plackets instructions and pattern are different from hawthorn version. And because of the super limited graphic instructions from the magazine, I struggled quite long with it. Otherwise, the shirt came up quite fast, around 2 nights and I really love the color pop of the under collar n buttons. I finshed the shirt yesterday night and immediately threw it into the washer to wash away the Crayola marker marks and worn it today with my denim skirt for a outlet shopping trip!

 
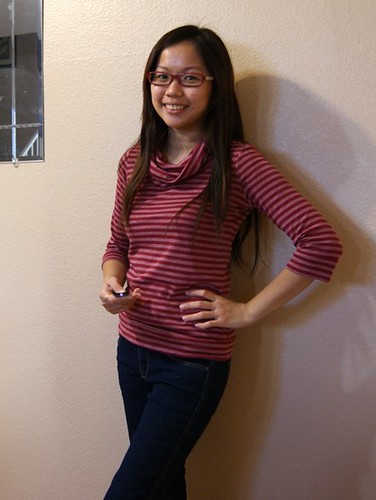
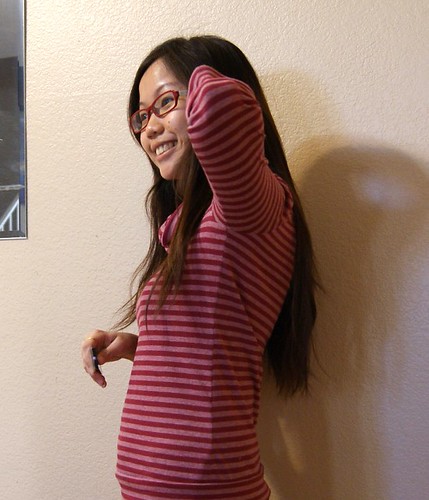
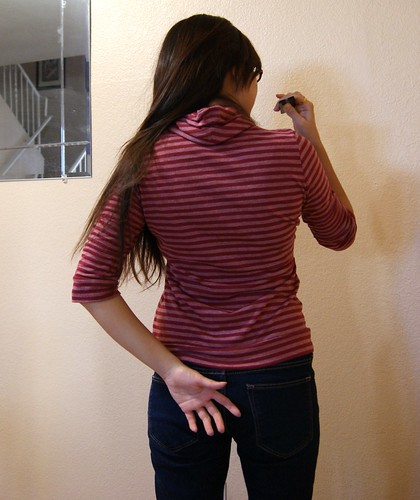
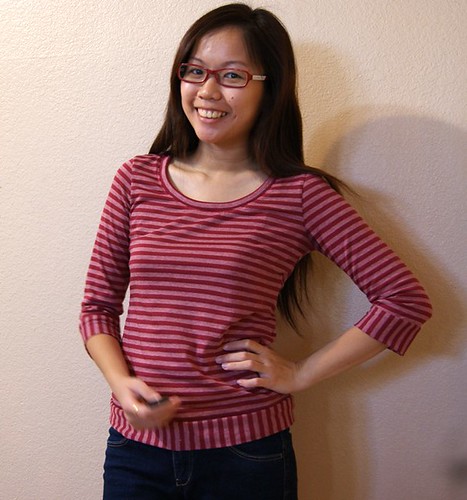
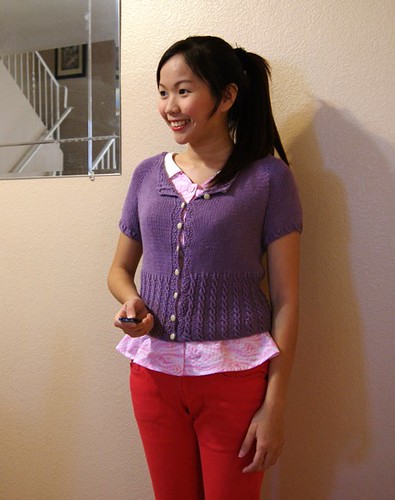
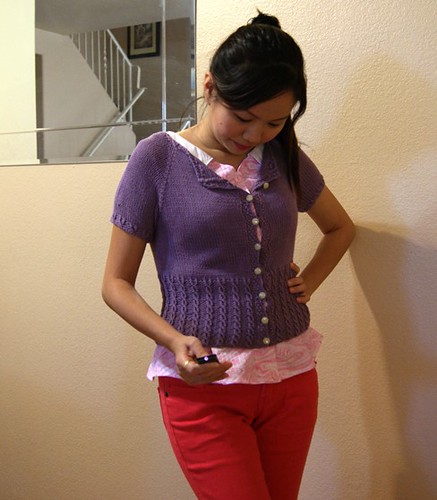
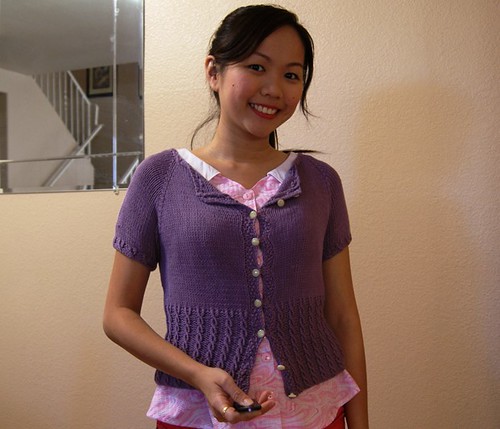
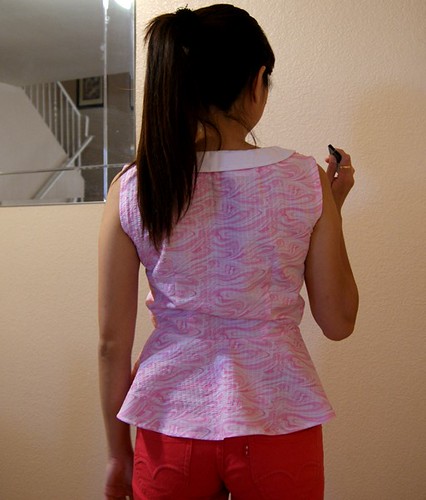
Sorry, I only manage to take the pic after the outlet shopping trip. That explains the messy hair and crumpled shirt. 
 
 
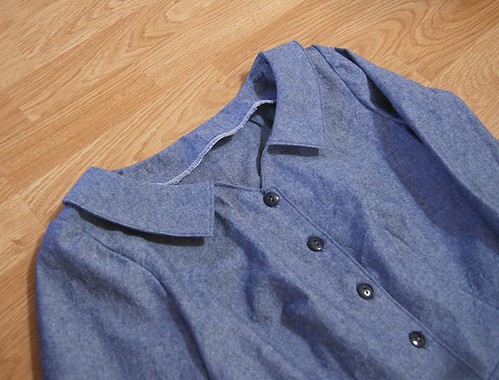
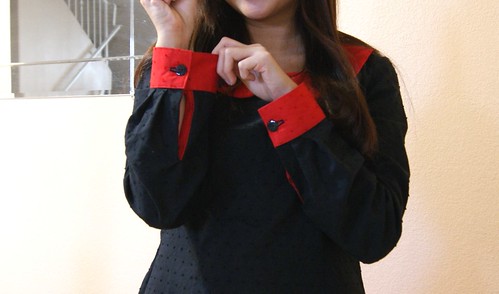
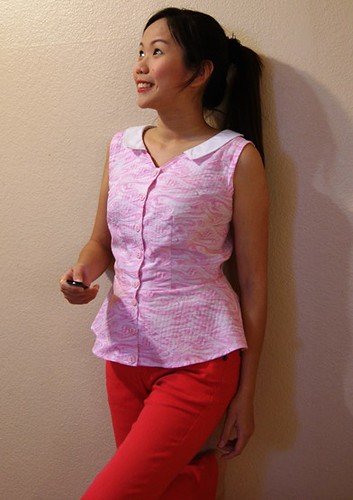
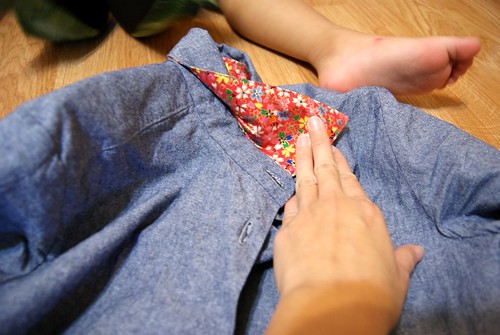
C the lovely jap flora cotton?
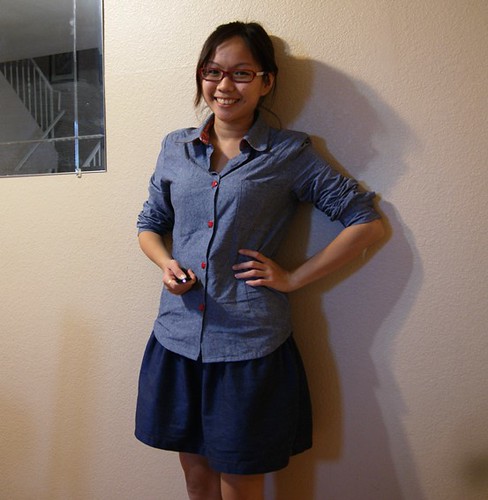
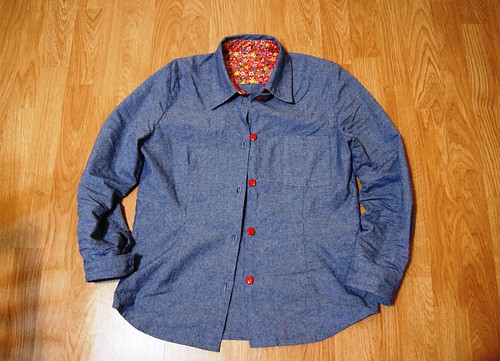
This chambray I got them at a steal of $3.98 usd from fabric.com. After I used it for the dress, I went back online and planned to get more to stock up but it was sold out:( And the next cheapest chambray they had is $6.98 per yard....
 
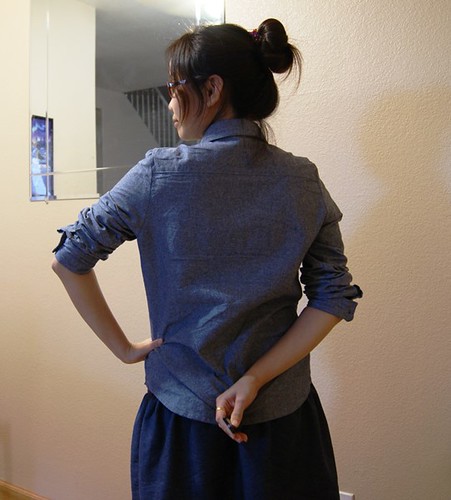
For this pattern, there isn't any back darts, so it's really a simple basic shirt pattern.
 
There isn't any Crayola marks left after the wash. What a cheap and great idea to substitute fabric markers.
 
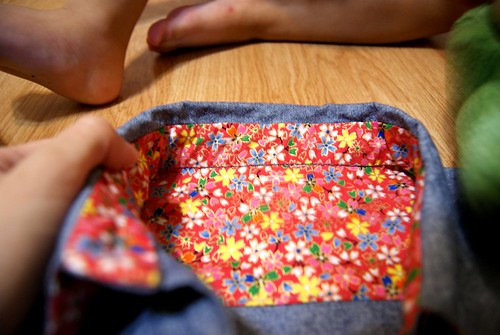
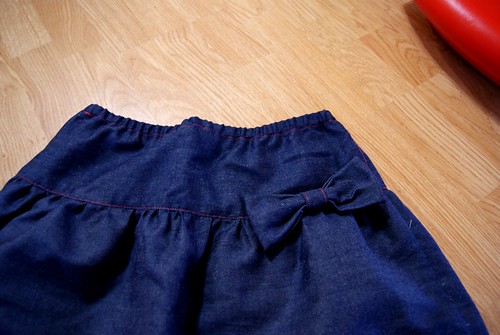
Close up of the jap flora cotton. They got a bit of gold outlines, really love the design and planning to use the rest for a dress?
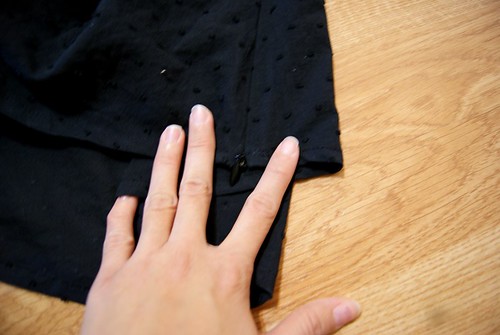
The inner under collar is hand slip stitched neatly.
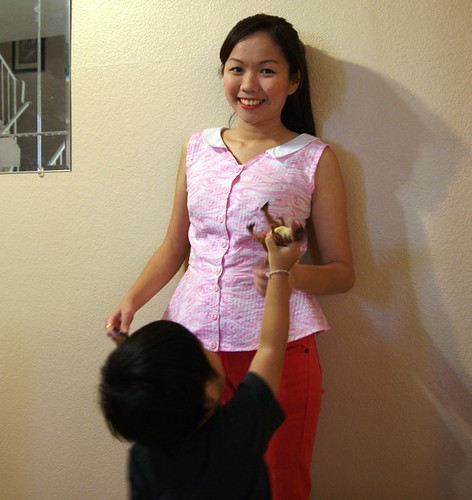
 
Peek a boo!
 
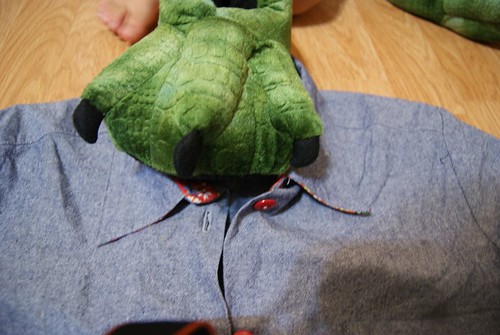
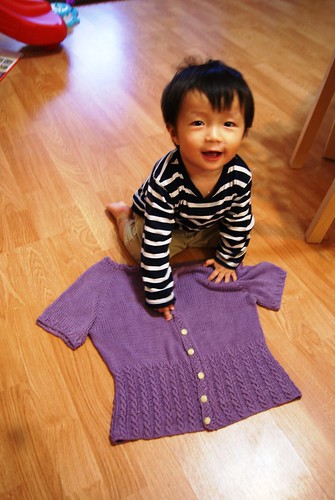
Oh No!!! Dinosaur invasion! (That's my bigger son new favorite dinosaur home shoes brought at children place today. He placed it onto my shirt trying to distract me to play with him.
 
I think this will be my last pc for the selfish sewing week. I am too exhausted from sewing and would like to spend this sunday lazing around instead. I really got to thank imagine gnats and made with moxie for hosting this selfish sewing week and motivated me to sew up so many lovelies for myself. Yay I got tons of new outfit for this fall finally!:)
 
Thanks for stopping by:
XOXO Ashley


Thursday, September 26, 2013

Selfish Sewing Week: Tons of fall Renfrew

In order to remedy my long sleeves tees condition in my wardrobe (I only had 1 store brought pc so far... LOL!) I decided to factory produce Renfrew tees. I had purchased yards of jersey knit from girlcharlee.com months back for the renfrews but when I sat down and tried to start cutting the fabrics, the stripes matching and the slinkiness of the knits put me off and they all got chunked back into the stash.

This time round, I got so desperate I had made up my mind to get started with them with a few tips from other sewists.
Due to the slinkiness of the knit fabric, I had a lot of problem in keeping them to sit nicely on the fold for me to cut them up. So I changed my pattern pcs instead. I traced the pattern pieces of the bodice front and back on the fold of a big baking paper. So I ended up with this:

Then I placed the pattern pieces of the knit making sure the front n back bodice sides seams are aligned with the correct stripes. Using Crayola washlable marker, I then traced the pcs again onto the fabric. The cutting process took way longer than usual but I am glad I did it, cos the end products look more professionally made with all the stripes matching!

Ohya, when I am sewing up the pcs, I used pin basting to align the stripes as well. And because my overlocker cutting blade is a gone case since day 1 (it's a long story, shall reserve it for another post. I broke the blades the day I got it), I used straight stitches to stitch the 5/8 seams first, then trimmed the seams down to 1/4 inches then I used my serger to serge the seams. A lot of extra time taken I know, any one knew where I can get a replacement blade for brother overlocker ?

 
This is the first tee I finished. As a mummy of 2 boys, I figured mid sleeves will suits me more as it will be easier to carry out my daily routines and duties without the need to keep rolling up my sleeves. This is the first time I made it in cowl neck version too! I love it!
 
 
Hohooho... C the matching stripes? Even the sleeves under arm seams matches too! I am so proud of myself:) Whee!


Sorry I got too carried away playing with the cowl until I became a potential sadako...
 
 
This is the second tee using the remnant knit. I cut the bands vertically as I had to make do with the remaining yardage I had.
 
This matches perfectly too!
 
I think I got too excited with how comfy and versatile the tees are, I immediately dug out my other navy stripes jersey knit and cut out another 2 renfrews as well.


Matchie matchie!.
 
Sorry for the photo bombing in this post. I think I should stop on my renfrews and start on other projects before my readers get bored to death. HA!
 
Thanks for stopping by:
XOXO Ashley
 

Tuesday, September 24, 2013

Selfish sewing week: Chambray Hawthorn dress

Yo everyone, this is my second pc for the selfish sewing week. The Chambray Hawthorn Dress by Colette patterns. After my first hawthorn blouse using the tutti plisse, I love the design so much and immediately started working on my second pc. This time in the mid sleeves version using chambray shirting fabric. And this time I did proper research online regarding the collar portion and then realized the collar mis-alignment is due to the instructions error. Chay, I thought what sia. (Singapore English language if u find it weird.)

 
Pattern used: Colette Hawthorn
Materials used: Chambray shirting from fabric.com, Black buttons from walmart, Interfacing.
 
Thoughts on the project: This time I got the collar placement nice and proper. I did a sba on the pattern pc following the Colette sewalong instructions, same as the previous blouse. But this time I shortened the bodice length further and the overall fit is so much better! Even though the darts still a bit pointy but that wont be too big a issue. Otherwise, everything went smoothly till the cuff part. As compared to the alma blouse placket and cuff, this hawthorn version is a lot more complicated and gave me quite a bit of headache. My cuff just cant line up with the sleeve and I had to widen the pleated portion to align the cuff properly. I believe a good 1 hour was spent on wrecking with the cuffs and plackets and unpicking some errors there as well. Luckily, I managed through it and finished the dress. Whee! to my perseverance...
Oh, for the interfacing portion, I skipped the front bodice and skirt facings portion. Cos I wanted to save on my interfacing (they r quite exp to me) and since they stated it is not a must. This also helps to make the collar part less bulky and they seems to sit nicer this time.
 
 
C how deep is my pleats? Till now I still dun understand where has gone wrong...
 
 
I shortened the skirt length by 4 inches for my height. So they r not as flare as they are meant to be.
 
 
All the edges are serged and I tried my best to top stitch as neatly and nicely as possible.
 
 
The waist seam aligns nicely too!. I am so proud of them dress. The buttons gap are meant for belt, I did add a hook and eye there so, yay, let the belt hide the weird gap.
 
 
The skirt hem is blind stitched by hand.
 
I can already visualize me wearing this lovely dress, wearing boots and black leggings during the cooler days. Maybe I should make another hawthorn in pink seersucker that I had in my stash?
 
Thanks for stopping by:
XOXO
Ashley


Selfish sewing week- Getting ready for fall


Hey everybody, this week is the selfish sewing week! Dedicated to beauties all for myself. The temperature in Phoenix is starting to drop, especially during the mornings and wee hours. This will be our first winter ever! I am so excited and cant wait to grab n throw snowballs at my boys this Dec during our planned roadtrip to Flagstaff.

First up is this swiss dots long sleeves alma top.
 
Pattern used: Sewaholic alma blouse
Materials used: Remnant swiss dots in black and red, invisible zipper, interfacing
 
Thoughts on this project: This is my 3rd alma blouse and I still love it a lot. I cut a straight size 4 cos I prefer roomy tops ( to hide my bulging tummy still). Usual shortening of the bodices length and I also shortened the sleeves by a good 1 inch (still a bit long for me though, will take note in my next alma long sleeve version). For this top, it asks for a 12" invisible zipper, but I only had a 9" YKK in stash. So I modified the zipper placement instead. It actually starts from the bottom hem instead of the middle. The zipper is a bit short, but the opening still allows me to wear the top easily, maybe it's because of the bigger cutting?
The placket portion is a bit new to me, I did struggled a bit but the instructions are very clear thus everything went slowly but smoothly. There's a bit of puckle though, but I dun think that's a big issue.

Duration taken: A few hours of cutting and sewing:)

 
I really like the color contrast of black and red. Red is my new favorite color!
 
 
My lovely plackets. LOL!
 
 
Pardon the powder smear on the collar part. The curved hem design really flatters the overall figure.
 
 
The change in the zipper position.
 
Meanwhile the following items are my plans for this selfish sewing week:
-a red stripey Renfrew cowl neck tee (pcs cut)
-a nautical stripe round neck mid sleeves Renfrew tee (will cut out tonight)
-a hawthorn chambray dress (done)
-1940s vintage inspired tie bow top
 
Hohoho, hopefully I can be selfish enough to finish them in time:)
Anyway, I have won a set of 3 sewaholic patterns from the sew mama sew community sewing match! I will be able to choose the designs, so far I have decided on getting the robson trench coat and  minoru jacket. For the last pattern I am still hesitating between the saltspring dress and the pendrell blouse. Due to my bucket waistline, I am seriously afraid that the saltspring dress will only make my no waistline even worse. But seeing all the lovelies dresses sewn by the others, I really cant decide. What do you all think? Saltspring dress or pendrell blouse?
 
Thanks for stopping by:
XOXO Ashley
 

Friday, September 20, 2013

Completed: Bamboo Peggy Sue Cardigan

 
Ok... Getting more efficient nowadays... Hoho...
 
Pattern used: This is the free knitting pattern by Linda named peggy sue. Knitted in size XS.
Yarn used: Rowan Bamboo Soft from stash. Brought them in sg at discontinued sale prices.
Buttons are pink pearl buttons from stash.
Needles used: Size 4mm circular needles
Duration taken: 2 wks on and off
Changes made to pattern: I just omitted one cabling  pattern from the waist as it seems to be too long for me.
 
 
Thoughts on the pattern: It's free! that's the most important part. So nice of them to design and put up free patterns for us crafters to enjoy.  LOL. The instructions are clear and easy to follow. Most of them are in stockinette stitch but the waist cabling portion is a bit tedious for me. I am still a newbie to cabling and I spent a lot of time knitting the cables.
Can I ask you all a question? Where do u put or how do you handle the cable needle in between the cables? I tried placing it on my lap first but find that takes a lot of movement and sometimes I dropped the cable needle and lost it and have to get up and find it. Secondly, I tried to hold it in between my lips, yup, super unhygienic and unglam of course. So lastly I tried poking the cable needle in the knitted portion of the cardigan, but it can sometimes slip off still. So what is your habit and any better suggestions?
 
 
This bamboo yarn is really soft but a bit too slinky for me. Not really warm enough for the coming fall season. And initially the cardigan is really tight, but after soaking in warm water, it somehow expanded magically and Voom! it became loose. Especially the neckline portion, it widens horribly... I still got to work on my blocking skills I think.
 
 
I might try knitting another one in other yarns in future. At least I did a bit of stash busting:) Cos I really had no idea what other stuff to knit using the bamboo soft.
 
 
Allen playing with the pearl buttons and trying very hard to pull it off my cardigan.
 
 
C the super out of shape neckline? Any idea on how to remedy it? Or is it a gone case?
 
Meanwhile, I just casted on a red long sleeve sweater. Hope I got the same determination to finish it in time for the cold season:)
 
Thanks for stopping by:
Ashley
 

Thursday, September 19, 2013

Completed: Tutti Pink Swirls Hawthorn


I hopped onto the hawthorn wagon finally! A bit slow, but I finally made it. All the hesitant is due to their c cup pattern size. I am only a B and a noob at fitting and patterns alteration. Luckily they had covered the SBA part in their sewalong, cos if they dun, I wont even dare to buy the pattern at all due to bad experiences in the previous hazel fitting. The macaron pattern is still lying in my stash untouched cos I dun wanna suffer the headaches yet. LOL! This time I choose the blouse version to test sew first as I wanted to add more separates to my wardrobe as they usually get more wears than the dresses. My life nowadays involves driving my boy to school, so I usually wear shorts or jeans these days, as it is easier for me to move around and carrying didi as well.

The collar is a bit bulky and still cant sit properly. I shall have a iron wrestle with it later on.
 
Pattern used: Hawthorn from Colette Version 1 but sleeveless instead, as I wanted to be able to wear it with my new cardigans without having distorted sleeves.
Materials used: Tutti Plisse Pink Swirls from Fabric.com, buttons from walmart, white broadcloth for collar. Pink satin store brought bias tape for armhole finishing.
Thoughts on this pattern: I cut a size 0 for the bust and taper to size 2 waist. First I made a simple muslim for the bodice section and it had lots of ease in the bust and back area. So I tried to do a tiny winy SBA according to the instructions in their sewalong. Not really sure whether I did it correctly:P And I also shorten the bodice by 1cm. It fits better in the final product but is still loose in the bust area and especially the back portion. The sew along did not cover on any back alterations though... Sad... I think the fabric also contributed to the looseness as it has a seersucker like vertical puckers on it which seems to flatten out and become wider after I pressed it while sewing. The collar couldn't meet the desired points of the bodice (for my muslim I used cotton broadcloth, and the collar has no problem at all.), causing the collar to look very far apart. In order to make do with the fault, I sew across and flatten the pointed areas of the collar part to  make the fault less obvious. Other than the fitting issues and the collar problems, the sewing process went through smoothly as the instructions are very clear and the sew along also helps a lot. If only Colette patterns comes in smaller bust cups patterns as well:)

C? The back is supa loose! I got bad spine alighment, the doc say it's S shaped so the shoulders doesn't seem to be that crooked. Maybe thay's why I have shorter torso, if my spine is straight, I might actually be taller a few more cms!

I still love this new top I had even though the collar and the fit is not as perfect as it should be. The pink swirls print is lovely and unique. I actually regretted buying this fabric at first, since it is used mostly for children apparels, but the prints really got to me. Have any of u sew a clothing for yourself using kids apparel fabrics? Feels a bit weird isn't it? The good thing about this fabric is, it doesn't wrinkles and that means no ironing needed! Whee!

 
This is my big boy Aidan with his beloved T-rex.
 
The peplum is lovely and helps to hide any tummy flaws. I have already cut out my second hawthorn long sleeve dress in chambray fabric, reducing the bodice length further by another 1cm more. Hope the fit will be better for the dress:)
 
Thanks for stopping by:
Ashley

Sunday, September 15, 2013

Completed: Navy Miette Cardigan

Yup, me in my auntie specs...


Wow is the word... I learnt so many new stitches from this cardigan. Other than the usual knit and purl, all the rest of the stitches I actually you tubed it and learnt from there. And it's my first time working on eyelets design and using DPN as well:) I am really glad that I started on this project and had the determination to finish it in time for fall season.
 
Pattern used: miette cardigan pattern by Andi ( It's free!)
Yarn used: Caron simply soft 2 skeins in navy color
Needles used: 5mm and 4.5mm circular needles and DPN
Duration: 1-2 weeks of on and off knitting.
 
I knitted the smallest size and there is still a lot of ease available. Especially in the back, but it's ok for me, as I preferred loose comfy fit to snug hugging. I also omitted some rows from the sleeves as I believed that the original pattern might be too long for me. So I just knit and fit as I go along with the sleeves.

 
The Cardigan is knitted from up to down, and the only seaming needed is the armpit portion. I just reinforced the areas with a bit of whip stitches. And the buttons seem to be a bit asymmetrical, I will get back to it asap.
 
 
After reading on many other bloggers on their knitting projects, I am so tempted to go for yarn shopping, especially those cashmerino yarns, just the name of it already sound so tempting and luxurious. But they are so expensive:( I just can't bring myself to 'check out' my online cart... In the end, I just grabbed these soft lovely and budget friendly acrylic yarns from Joann to satisfy my knitting craves. Maybe in future when I have more spare cash, I might indulge myself in a tiny luxurious yarn shopping spree:)
 
 
The next knitting project progress. Can you recognize this design?
 
Anyway, I got my first customer for my esty shop this wk! I actually stunned when I received an email from etsy saying that I had made my first sale. I got so excited until I couldn't sleep that night and went to work on her clutch order straight away. She will be using it for her wedding next Saturday.  Yah, wedding o! Hohoho... May she have the most magical n lovely wedding in the world.
 
Thanks for stopping by:
Ashley


Friday, September 13, 2013

Completed: Casual outfit

Finally there are more completed projects for me to blog about. My sewing time has decreased tremendously when my elder son started his preschool this month and a knitting bug crept inside me. But looking at my super pathetic fall wardrobe status, I am now picking up on sewing my pace this few days. So I promise that I will have more FO posts in the next few weeks including the popular Colette Hawthorn!
 
Today I got 2 simple and easy projects to share. Both of them are simplicity patterns I had in my stash, and fabrics are also from my huge collection of stash as well. 
 
 
Pattern: Simplicity (To be updated)
Fabric: Light pink semi sheer cotton purchased back in Singapore. Buttons are reused from old unwanted apparels. 
Thoughts on this project: I had this fabric in my stash for many donkey years. Fell in love with the cotton and the sweet stripes design and brought it on impulse with no real idea of what it can be made into. This time I finally decided to cut into it and sew a loose comfy blouse for myself. It is a bit sheer though, but it shouldn't be a problem if I had the correct inner wear on. (Sorry for the black inner pc shown in the pic, just so lazy to change into the proper one.) I cut a straight size 0 for it, since there is a lot of ease included and the overall fit is still quite loose. For the alterations wise, I only shorten the bodice length by my usual 1 cm and that's it.
 
 
The v neckline is a bit low, maybe I should go add a little snap to make it more decent?
 
The total time taken to sew this blouse is quite fast actually. The only pain in the neck is the collar portion. I cant really get the inner collar band to sit nicely while I top stitch them down. I tried ironing but my machine foot keep distorting the folds underneath. Now the insides are a bit messy and I gave up trying to unpick and restitch them back nicely. The sleeves design are quite cute and flattering. I might sew another pc in a thicker fabric and in 3 quarter sleeves version in future.
 
 
This blouse is really comfy and cooling but not really suitable for the coming fall season. What am I doing? LOL... I dunno, I just keep having sewing block this few weeks. Meanwhile, I will wear this top as much as possible before the temp starts to drop here:)
 
And now for the super easy peasy denim skirt.
 
 
Pattern used: Simplicity skirt pattern
Fabric used: Remnant denim fabric from my denim Kelly skirt.
Thoughts on this project: This skirt only takes less than 2 hours from cutting to finishing. It only have 2 pattern pcs for this version. And the waistband is just a fold in and elastic and no pockets at all. Very basic and super good for modifications and embellishments. I just added a denim bow to the side of the skirt and added a bit of topstitching in red threads.
 
 
This skirt is a great match for tucked out tees and blouses. Comfy and casual. I am wearing this skirt as I am blogging now. So there will definitely be a lot of wear for this pc. And this skirt is great for fall too, I can match it with leggings and boots:) Ruffles skirts are great for flattering boxy waistlines.
 
 
And I am planning to stitch up another ruffle skirt in black lace soon.
 
That's all for today!
Thanks for stopping by.
Ashley