Tuesday, June 25, 2013

Nautical Alma Top

 
Pardon my messy hair... This is me and my big boy saying ahoy mateys! LOL. He is getting better at posing:)
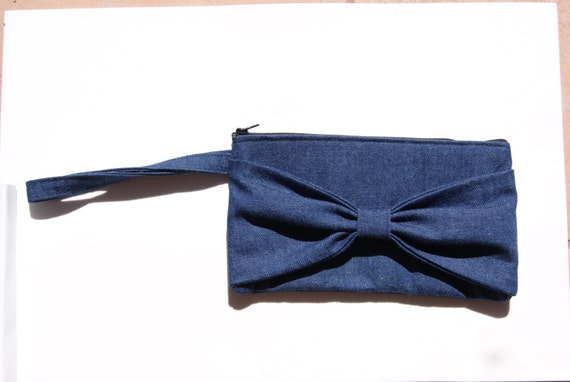
I brought this anchor away fabric by Michael miller from fabric.com last month. 3 yards of it, and I can churn up one alma top for myself, a suspenders shorts for my big boy, a bow clutch and still have a bit of left over which I am thinking of a messenger bag for my boy. LOL. I really did made full use of the 3 yards isn't it?
 
Pattern used: Sewaholic alma blouse
Materials used: Michael Miller Anchor away in boy blue, white cotton broadcloth
Changes made: I cut a straight size 4 for this top and only shortened the bodice by 1cm. Ohya I also shorten the mid length sleeves to suit the summer weather here. Really hot!
Time taken: 2-3 hours? Not really sure. As its' my second time sewing this alma blouse, everything just kind of whips up in a whiz.
I never sew a sash for this top cos from my previous experience with my swiss dots alma top, I am just too lazy to dig out the sash and wear it.
 

I really like how the peterpan collar is different for the top and under pc. This helps to ensure that the peterpan collar lays flat and the folded line around the collar will be hidden underneath.

Sorry for the wrinkleness. I have been wearing this top the whole day before I remembered to take the pics for this blog.

 
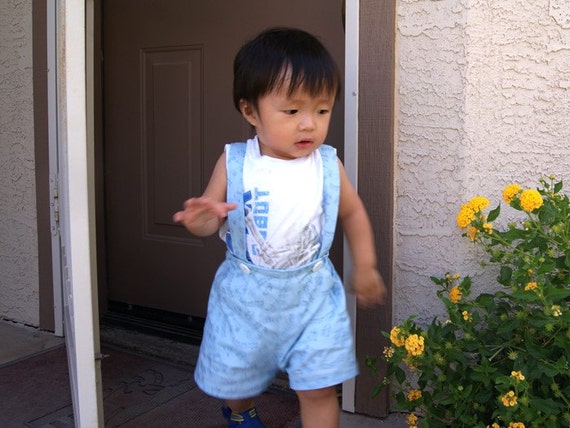
Shop updates: New clothing added! Custom make a cute little boys suspenders for your little ones here. Available in 3 sizes and lots of fabric choices.
Handmade with love toddlers boys suspenders shorts
 
And my little boy allen is my super model of the day.
 
Thanks for viewing! XOXO Ashley


Sunday, June 23, 2013

My mermaid hazel dress

Yay! A simple hazel from Colette Patterns. And because Colette patterns sizing for the bust is really big, I made a muslim for this, altered the bust darts and took in 4cm from the sides. The altered bust darts made it a little pointy. First time doing this kind of alteration, not really sure whether is it correct or not. But other than the slight pointiness, the overall fit is much better.

Materials used: Kona Cotton 1.5yard, invisible zipper and interfacing
Ribbon for trimmings and DMC floss for embroidery.
Time taken: Not really sure, the muslim fitting and alterations took up a lot of time.
Changes to the pattern: As written above and I also shortened the skirt a lot.
Will I make this pattern again? Hmm the pointiness makes me a bit unwilling to sew up another hazel. And i also had a Macaron sewing patterns from Colette which i am so scared to even touch it now. Any idea why and how should i solve this problem? Will really appreciate your suggestions and comments on this issue.
 
Initially, I finished the dress with only the ribbon trimmings. While taking pics for the blog, it kinda looks very plain so I added a small mermaid embroidery to the skirt instead of the usual anchor pattern normally seen. The mermaid design is from a embroidery book I got from amazon a few weeks back.
 
 
The designs are really cute and mostly consist of outlines stitching only. So they are really easy to stitch and will make lovely embellishments for many garments. Love this book:)
 
Messy hair again... HA! And my big boy decided to join the shoot too! He is waving non stop at the camera saying CHEESE:)

Signature pose. LOL.

 
A cute mermaid embroidery.
 
Currently, i still have another nautical alma blouse wearing to be blogged, and i am factory sewing 3 boys suspenders shorts. A half completed cosplay costume waiting for the tulle materials to arrived at my doorstep. Lots of projects, yet not enough time.
 
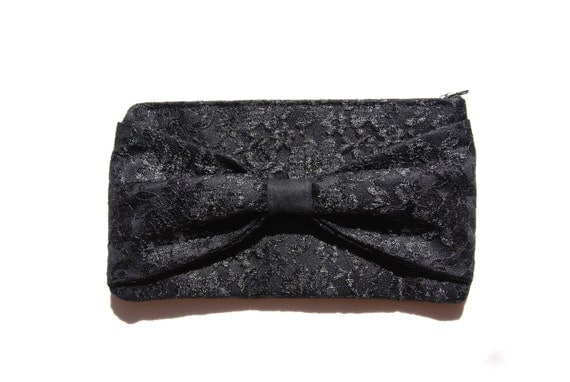
My Etsy shop updates: Added 2 handmade clutches for sale:)
All under 20usd. Do support:) Thank you.
 
Handmade Black Lace Bow Clutch
 
Thanks for reading:)
XOXO Ashley

Saturday, June 22, 2013

Ways to save up on fabric shopping...


I loves fabric shopping, who doesn't? Here are some little tips I will like to share with you all on how to save on fabrics, back in Singapore and here in US.

Back in Singapore, as I do sewing commissions for cosplay costumes for fellow cosplayers, I almost need to make a trip down to Chinatown people's park to get the materials. Other fabric shopping heavens in SG I been before will be arab street and the super expensive but air conditioned Spotlight in Plaza Singapura Orchard.

Tips to save in SG:

1) Try to collate the materials and buy them from the same shop. You can really bargain down the price of the fabrics a lot.


For example, I will buy almost 10 plus metres of fabrics from a particular store in People Park. No need to be the same material, it can be 2m of this, that and that and that. The auntie knows me very well and she knew that I sew costumes for other people, and that I will be a frequent customer. So I get to enjoy wholesale pricings for the fabrics and sometimes, free fabrics too!:) Who doesn't love free things? LOL. For the same pc of fabric, the normal retail price can be above $10sgd, but she sells me at $5. That's a huge difference:)


2) Join Spotlight member and subscribe to their promos email.

Spotlight stuff is expensive, but when they got huge promotions, you can get high quality fabrics, materials at a cheap price:) I never buy their stuff when they are not on sale. Being a member, you get to enjoy their member sales prices and a first time updates on their coming sales event. Whenever they have a 50% or 30% storewide sale, you will find me running there and shop like crazy... That's y my fabric stash are endless and can occupy a whole room.

3) Stock up on essential basics when they are on sale.

White, black cotton are a very common essentials and I normally get 10m of them each time. Even if the costumes are in other colors, white cotton can be used as their linings. So it is easier and cheaper if you can stock up on them at home, without having to make a trip down when u need them.

 4) Bargain on the prices, dun be shy...

I feel so auntie when I said this, LOL. I always ask for lower prices no matter how much I buy and I also will tell them I sew for a living (even if you don't, who cares?) and automatically I will be given a cheaper pricing. Ohya, this only applies to Chinatown people park and arab street.

Actually I only went to arab street for fabric shopping once, and got super disappointed. One thing is, I really dunno the place well and I dun feel comfortable stepping in the shops. I only manage to get some 4m of fabric and I can't find a shop that sells notions which I needed that time. So I recommend you all to just get comfortable to 1 or 2 shopping heavens and spend all your money there. Hahahah.


Now on to the fabric shopping in States.
I still haven got my driving license yet, so most of my shopping is done online. Fabric.com. I like it more compared to joann.com. I feel that it is cheaper and I can get great deals there.

Tips in united states:

1) Register as member and try to always get your shopping needs from one website.

You can get to enjoy their rewards programs and save more:) For example, fabric.com offers points for every purchase you made. You can use the points to redeem for cash coupon for future purchases. Tip is to only redeem the points when they reach at least 10usd value and above. As their checkout only allows one coupon per use. It will not be worth it if you redeem a 5usd coupon as their usual 10% off or 15% off discount coupon can cover more value than that.

2) Try to get fabrics and notions that are on offer.

 No offer on it? Wait it out, some day it will be... Unless u can't wait of course.

3) Sign up here ebates for online shopping. They have quite a bit of registered fabric online stores where you can spend your money and get cash backs! For example: fabric.com offers 4% cashback. So if you enter fabric.com via ebates and made a $100 purchase, you get $4 cashback. What a great way to earn money as you shop.

4) Make full use of the coupons available:)

Okok.. The most wordy post I had so far. What about you? Any other tips on saving while shopping for fabrics?

Thanks for reading:
XOXO Ashley


Sunday, June 16, 2013

Sewing for boys book review and a nautical suspender shorts


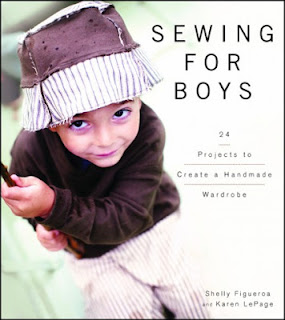
You all know that I had 2 lovely hyperactive boys, and this book is a must for me then:) Got it from amazon.com and after flipping through all the cute projects, this mimi suspenders caught my attention.

 
How cute and English it looks. Imagine my boys wearing them in Singapore! LOL! And once I ordered this book online, I also head on to my favorite site: fabric.com for some cute boys print cotton.

Tadaa! This is my version. Pls ignore the mismatch of the inner tee. I am just too lazy to change him into a proper matching tee. I made this using Michael millers anchor away in boy blue. A fast stash busting project. They are actually remnant fabrics after I have cut out my alma top. Great! We can wear it out together one day.
 
Review: This book covers a lot of projects for the boys, but! the instructions are not really clear and well illustrated. I keep having problems in understanding the written illustrations. Which is a joke, cos I can understand a Japanese sewing instructions just by the pics alone. Maybe I am more of a graphic person? So most of the sewing process, I just based on my sewing experience and sniff my way through. Luckily it turns out well. And my bigger boy love it. I don't even need to bribe him for the photos. He cheerfully just stood there and cheese loudly for me. Super model coming through:)
 

See my cutie back? I am holding on to my new gumppy shark toy mummy brought for me at target today. Shark is my favourite... Arrrgh!
 
Super cheesy cheese!
 
I think I still can squeeze out a nautical clutch for my esty collection. Yay!
XOXO, Ashley


Black Swiss Dots Alma Blouse

Long time no see! I have been busy sewing and sewing non stop everyday since my husband went for his overseas trip. Shall slowly upload the sewn projects one by one. And good news! I will be starting a humble etsy shop selling handmade clutches, purses and clothes. Do watch out for it and show some support:)

On to my lovely new blouse. The sewaholic alma blouse:) Been itchy to start on it ever since I got hold of the pattern one month ago. It's a really simple and versatile pattern, with so many variations you can create with it.
Background-Kitchen.. Notice the stains on my camera lens? LOL!
 
Sewing Pattern Used: Sewaholic Alma Blouse Version A
Materials used: 1.5 yards of Black swiss dots from fabric.com. Medium weight interfacings and invisible zipper.
Changes made: I cut a straight size 4 and shorten the bodice by 1cm. Overall the fit is still a bit loose on me. But I like it this way. Used a 9" zipper from my stash cos I dun have any 12".
Will I wear it?: Of course! I love it! The swiss dots fabric is so soft n comfy. I already wore it twice before I blog this post. Although this fabric is a wee bit sheer, I didn't line it cos it's black. And it's perfect for this hot summer weather now.
Notes: This swiss dots fabric is a breeze to sew. I still have 1.5yards of remnant left to be made into another lovely summer top... Hmm what pattern should I use? Any recommendations?
 
 
No make ups as usual...

Ar! The little one also wanna join in the shoot.

Looks great without the sash as well:)
 
On my table: I am halfway through another alma blouse in version B in Michael millers anchor away fabric. Can't wait to finish it tonight.


Monday, June 10, 2013

Free Boys Patch Pocket Pants Pattern Tutorial

Dear friends before I start on the tutorial, could you all kindly head over to Skirt Week and kindly give me a vote for my denim Kelly skirt no 8? The voting for this a line section will end before midnight tonight. So pls!!! Do kindly give me a vote if possible. Its my first time taking part in a blogger online contest and I am really excited about it:)

Sorry for his grumbly look. It's really difficult to get him to stay still for pics.

Sweets Time!


Now for this simple and cute boys patch pocket pants. It is available in 4 different sizes: S, M, L and XL. You can download the free pattern here:

https://www.dropbox.com/sh/2u0hg0pchsekr7q/vSI5fHANO2
Pls kindly note that I am not a professional pattern drafter and everything is self taught. Thank you.

Materials used:
Cotton remnants less than 1 yard. Contrast cotton material for the patch pockets. And 0.9cm elastics.

This is a really good stash busting project and is easy and fast to whip out. I already made 2 for each of my boys.

Tutorial:
-First download the patterns from the link above and tape them together. Note no seam allowances is included in the pattern. You need to add it on yourself.


waistline add 3cm
hem line add 3cm
all the other seams add 1cm

 
-Finish the edges of the patch pockets by zigzagging or overlocking. Press the seam allowances and baste.

 
-Place the patch pockets 3cm below the waist line (total 6cm from the edge of the top) align the side seam and stitch down the patch pockets leaving the diagonal side open. Repeat for the other side.
 
 
-Finish the edges of the crotch seams for the front and back pcs. Now, stitch the front curved seam together with 1 cm SA. And repeat for the back curved seams. (So sorry not sure what this seam is called. Crotch seam? No? )

 
-They should look like this:)
 
 
-Next, align the middle leg seams together, pin and stitch. Stitch the side seams.

 
-Press the waist SA and the hem allowances. You can finish the hem allowances at this point.

 
-For the waist band casing, you just stitch 2.5cm (1 inch) from the folded edge. And a second row of stitch 1.25cm from the folded edge. Remember to leave a unstitched portion for you to thread the elastics.
 
 
-For the elastics, you can measure them against your child for the length. For both of my boys, I used 40cm (SA included).
Thread both upper and lower casing and stitch the ends of the elastic together.
Once done, finish off the open portions of the casing.
 
 
Tadaa! A cute and simple pants for your boys:) This pattern is very basic and you can make a lot of variations to it. I am thinking of embroidering the pockets for a more personal touch. What do you think?
Hope you all enjoy this little tut and happy sewing!
 
Xoxo Ashley


Friday, June 7, 2013

Entry for Skirt Week 2013

Hi everyone, sorry for the late update. I have been busy embroidering my new skirt for the Skirt Week 2013. I saw this beautiful skirt tutorial on Stitch Summer 2013, and love it at first sight. I used some navy broad cloth from fabric.com and the embroidery threads are from my huge collection of DMC floss when I had the cross stitch frenzy many years back.

Funny pose... Pardon my messy hair as always. I am wearing it with my megaphones tee.
Skirt Pattern: Cut according to my own measurements using the magazine tutorial. But I changed it a bit to add inseam pockets at the sides. For a mummy with 2 boys, pockets are really important and handy as our hands are always full.
Materials used: Navy broadcloth from fabric.com around 1.5yards. DMC floss in blue, green, yellow and slight darker blue. 9" zipper. (I threw up a fuss because of the zipper. Long story ahead)
Duration to finish: The skirt took me 1 hr to churn out but the embroidery... many long nights... Its my first time embroidering and I really like how it turns out, all my hard work is worthy.


No make up today cos I stayed up till 3am last night to finish the embroidery in time for skirt week.


Here comes the stupid zipper part... The pattern calls for invisible zipper closure, and I love inserting invisible zippers all along but why did I ended up using a normal zipper? It's because the 2 times of perfect invisible zippers insertion gone haywire when I tried to wear the skirt! The first time, the zipper couldn't zip up properly and ended up broken when I turn violent... OOPHS... Then I removed the zipper and inserted the second invisible zipper. This time I can zip up the skirt but the zipper split open. What the hell!!!!!!!!!!!! I almost pulled out my hair when that happen! Blame it on me, for using cheapo zipper from Daiso. (a $2 SGD shop in SG. $2 for 4 invisible zippers. Cheap right? but damn lousy quality) So I removed the zipper again, cough... by violenting pulling the zipper out... Lucky my skirt survived the shock. LOL! And I used this standard zipper from Coats and Clark. Finally! I made it in time for the skirt week!

crafterhours
 
I not really sure how it works... Just hope that I did my submission correctly:P http://www.flickr.com/groups/2215587@N21/
U can find my entry above...
 
Thanks for reading:)
XOXO Ashley

Monday, June 3, 2013

Free Kids Raglan Sleeves Tee Sewing Pattern

Aidan wearing the tee. The tee is still a bit oversized but its ok, they grow so fast. Making it bigger can lasts longer:)

The pattern is available for download here: https://www.dropbox.com/sh/1mfg0r422ohbztl/lvXI639ifN
Note: I am no way a professional pattern maker and so on. And the patterns are all hand-drawn and scanned. So pls pardon the untidiness and if there is any error, pls notify me @ sewashley87@gmail.com and I will look into it. Thank you!

Finished tee measurements for size S, M, L and XL
Chest: 65cm, 68cm, 70cm, 78cm
Length: 37.5cm, 40.5cm, 43.5cm, 46.5cm
Sleeve: 15.7cm, 16.5cm, 17.5cm, 18.4cm

Instructions:
1) Download the files in the link above and print them out. Make sure that your printer are set to print with no margins.
2) Tape the sleeves (2 pages), front bodice (2 pages) and back (2 pages) together matching the notches.
3) As the patterns doesn't include any seam allowances, you got to add your own by following the amount stated in the pic below. There is no need to add any seam allowance to the neckline as we will be using a bias tape.

 
 4) Cut out the fabric pcs and the bias binding.
5) Stitch the front pc, sleeves and back pc together at the diagonal seams. Iron the seams open.

6)Next will be to bind the neckline with the bias tape. Firstly, fold 0.8cm down one side of the long edge of the bias tape and press. Stitch the side seams of the tape together with a SA of 1cm. Then pin the unfold edge to the right side of the neckline. Tip: Stretch the bias tape to fit the neckline. Stitch 1cm from the edge round the neckline. Fold the bias tape up along the stich lines and turn it over. Align the folded edges with the previous stitch lines, pin in place. Lastly, stitch as close to the folded edge as possible round the neckline.
7) Stitch the side seams of the tee from the sleeves all the way down and iron the seams open.
8) Turn up the hemlines of the sleeves and the front and back hems and stitch them down. (You can use zig zag stitches or a double needle)
9) Tadaa! the tee is ready for action! Now is the time to sit back and relax and see your precious babies enjoying themselves wearing mummies' work:)

Do share with me your completed tees at sewashley87@gmail.com or comment in this post with the links if you have used my free pattern. So I can collate and put up a post specially for readers' projects:)


Happy Sewing!
Ashley
* Will remember to take instructional pics in the next round of sewing this raglan tee for my boy... So sorry for the lack of pictures first time round as I am too excited to stop and reach for my camera:P